


Little Waltham Aspiration and Challenge Award Programme for Years 1 - 6
To engage and extend learning across all year groups, each topic is accompanied by a Challenge Question, several Project Options, and an outline of the higher level thinking skills involved.
Each project is designed to challenge pupils with creative, analytical tasks that promote higher-order thinking. The projects can be pursued independently at home (as optional challenges) or integrated in class for enrichment; teachers can provide feedback at school to support development. We also include cross-curricular subject links to highlight how each challenge connects to broader learning areas (e.g. Art, Computing, History, Science). Pupils are encouraged to choose one project per topic to explore in depth.
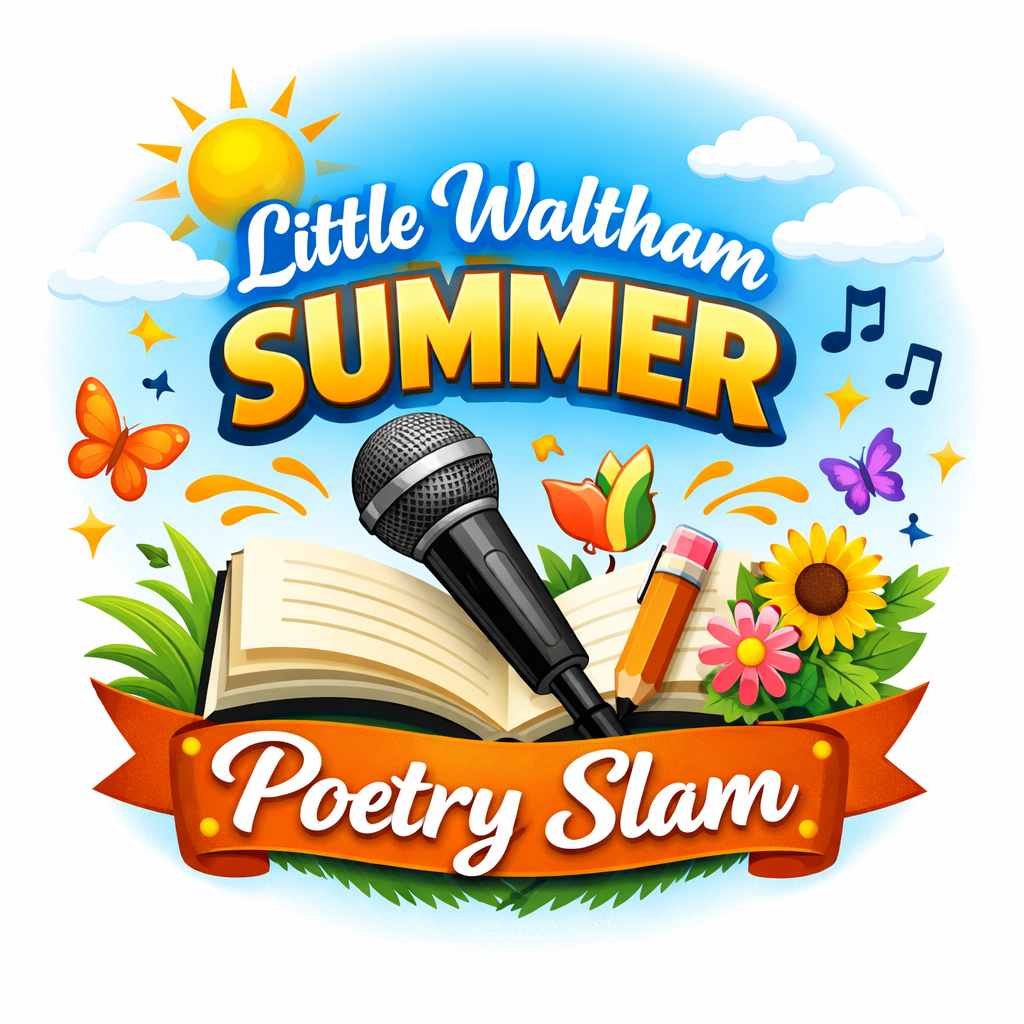
In the Spring 2 half term and the Summer 2 half term, the usual at-home challenge projects are replaced by whole-school oracy events. These provide every pupil with the opportunity to develop confidence, communication, and performance skills through the Little Waltham Speech Festival and Poetry Slam.
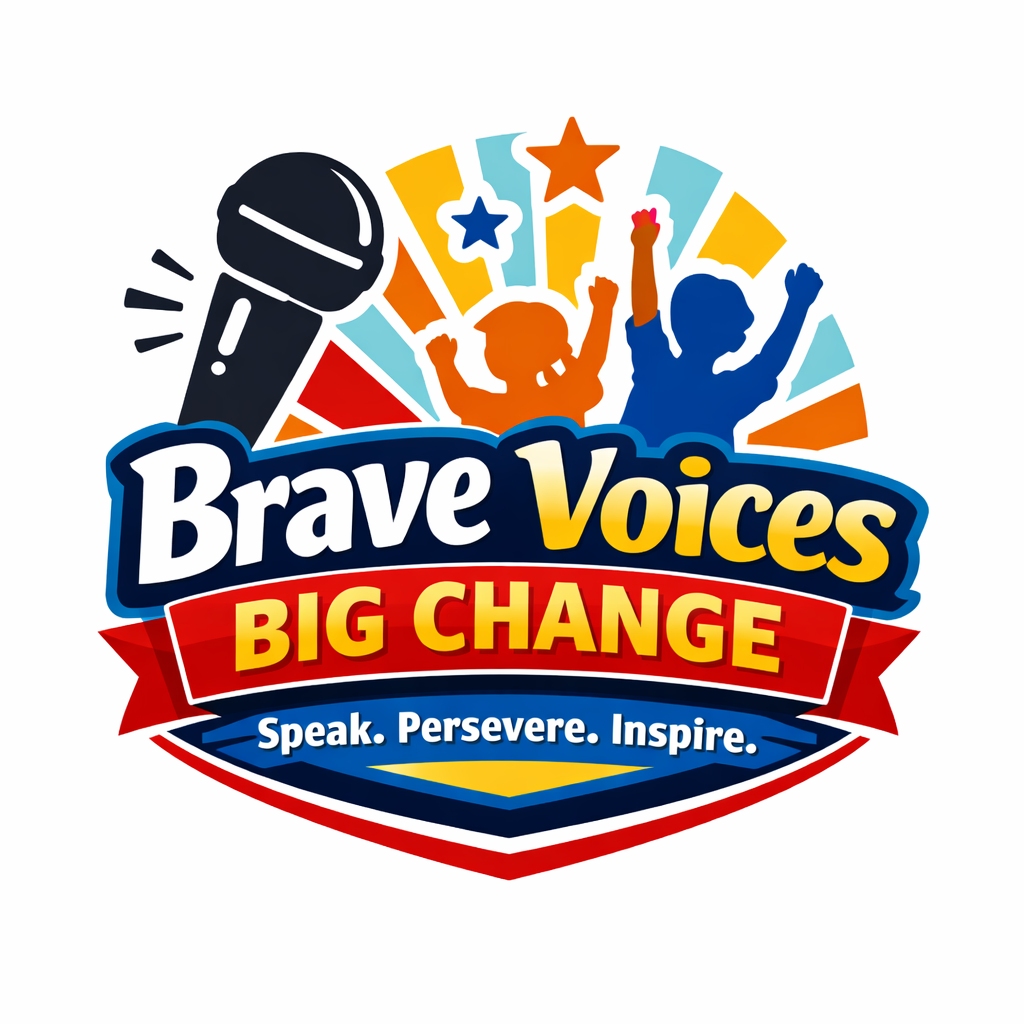 Little Waltham Speech Festival Spring Term Little Waltham Speech Festival Spring Term |
Little Waltham Summer Poetry Slam |
Extended Challenge Homework Projects
Year 1 Autumn 1: Timeless Treasures – Exploring Toys from the Past
Challenge Question: Why are some toys considered “timeless treasures,” and how have toys changed over time?
Project Options (choose one):
1. Toy Museum Exhibit: Curate a mini “toy museum” at home. Select 3–5 toys (including at least one old-fashioned toy and one modern toy) and display them with labels. Write a short description for each toy, explaining what it’s made of, how it works, and how it reflects the time period. Consider how materials or technology have changed from past to present.
2. Then vs. Now Comparison: Create a visual chart or scrapbook page comparing a toy from the past with a similar toy from today. You might use drawings or printed pictures. Annotate your chart with notes on differences in design, safety, materials, and how children play with each toy.
3. Interview & Report: Interview a parent or grandparent about their favourite childhood toy. Prepare questions in advance (e.g. “What was it made of?” “Who gave it to you?” “How did you play with it?”). Afterwards, write a short report or story sharing what you learned about that toy and how playtime in the past might have been different or the same as today.
Year 1 Autumn 2: Discovering Little Waltham – A Journey Through Our Local Area
Challenge Question: What makes our local area special, and how can we discover its hidden history and features?
Project Options (choose one):
1. Local Landmark Tour: Create a guided tour brochure or map of Little Waltham highlighting 3 important landmarks (e.g. the church, school, park, historical buildings). Draw or include a photo of each location and write a sentence about its significance or a cool fact. You could number the locations on a hand-drawn map to show where they are.
2. Now and Then Photo Story: With the help of family, find old photos or stories of your local area (from newspapers or local history books) and take current photos of the same locations. Make a poster or digital slideshow showing the “then and now.” Describe what has changed in each place and what has stayed the same in the community.
3. Community Interview Podcast: Imagine you are a local historian. Interview a longtime resident or use a family member’s memories to learn about how Little Waltham has changed over time. Record the interview (audio or notes) and create a short “podcast” or written article. Share interesting stories (e.g. “When I was young, this street used to...”). If recording audio, add your own narration to introduce each story.
Year 1 Spring 1: Wonderful Wildlife – Discovering Animal Life Across the World and Their Survival Skills
Challenge Question: How do animals around the world survive in their habitats, and what amazing adaptations help them live there?
Project Options (choose one):
1. Habitat Diorama: Choose an animal (e.g. polar bear, jungle tiger, desert lizard) and build a shoebox diorama of its habitat. Include at least 3 features in the scene that help the animal survive (for example, an arctic diorama might have snow and ice; a rainforest diorama might have dense trees). Write labels or a short paragraph explaining how each feature or adaptation (thick fur, camouflage coloring, etc.) helps the animal live in that environment.
2. Survival Superpowers Booklet: Make a small booklet titled “Animal Superpowers.” Pick 3 different animals from different parts of the world and devote one page to each. On each page, draw the animal and describe one incredible survival skill or adaptation it has (e.g. “The camel has humps to store fat, allowing it to survive with little water.”). Share why you find each adaptation interesting or important.
3. Wildlife Documentary: Create a short “documentary” about an animal of your choice. This could be done as a video (you could film yourself acting as a wildlife presenter, or narrate over clips/photos of the animal) or as a written report with pictures. Cover where the animal lives, what it eats, and one challenge it faces in the wild. End with a fun fact or a question to make viewers think.
Year 1 Summer 1: Capital Explorer – Discovering the Unique Cities of the United Kingdom
Challenge Question: What makes each capital city of the United Kingdom unique, and how do these cities compare with one another?
Project Options (choose one):
1. City Travel Brochure: Pick one of the UK’s capital cities (London, Edinburgh, Cardiff, or Belfast). Create a colourful travel brochure or poster for tourists. Include the city’s name with a bold title, draw or paste pictures of 3 famous landmarks, and write a catchy slogan or short blurb for each landmark explaining why it’s special (e.g. “Visit Edinburgh Castle – a fortress on a rock, home to Scotland’s crown jewels!”). Make sure your brochure shows what makes that city unique.
2. Capitals Comparison Chart: Make a comparison chart for two capital cities of the UK. You could compare London vs. Edinburgh, or any other pair. Choose 3–4 categories to compare (such as population size, a famous landmark, a special tradition or festival, maybe the languages spoken, etc.). Present your findings in a table or poster. For example, “London – Population ~9 million, Landmark: Big Ben; Edinburgh – Population ~500k, Landmark: Edinburgh Castle.” Add a sentence on which city you’d like to visit and why.
3. 3D Landmark Model: Build a model of an iconic landmark from one capital city using household materials (e.g. cardboard, paper, recycled containers). Examples: Big Ben (London), Cardiff Castle (Cardiff), Edinburgh Castle (Edinburgh), Titanic Belfast museum (Belfast). After building your model, write a short “museum label” for it: name the landmark, the city, and one interesting fact about it. You could even bring the model to school for a show-and-tell.
Year 2 Autumn 1: The Great Fire of London – A Blaze That Changed the City Forever
Challenge Question: How did the Great Fire of London start, spread, and eventually change the city, and what lessons were learned from it?
Project Options (choose one):
1. 1666 News Reporter: Write and illustrate a old-style newspaper front page about the Great Fire of London. Include a dramatic headline (e.g. “Inferno Engulfs London!”), a drawn “engraving” or picture of the fire, and a short article describing key events from Sunday to Wednesday of 1666. Try to include who, what, when, where, and why (e.g., “The fire began in a bakery on Pudding Lane... strong winds spread the flames...”). You could age your paper with a tea stain effect for authenticity.
2. Map of the Fire: Draw a map of 1666 London and trace the spread of the fire. Mark the River Thames, Pudding Lane (where the fire started), and important landmarks like St. Paul’s Cathedral. Use arrows or coloring to show how the fire spread each day. Add a legend or labels. On the side of the map, write a short paragraph on why the fire spread so quickly (think about the tightly packed wooden houses, wind, and lack of firefighting).
3. Tudor House Model (and Safety Plan): Create a model of a Tudor-style house like those that burned in the fire (using a small cardboard box for the structure and paper for timber-frame designs). Once built, imagine you are an architect after 1666: what new features would you add to houses or cities to prevent such fires? Write 3 ideas on a card (for example: “build houses with brick instead of wood,” “make streets wider to act as firebreaks,” or “start a fire brigade with water pumps”). Display your ideas next to your model house.
Year 2 Autumn 2: Umbrellas and Wellies – Exploring the Wonders of UK Weather
Challenge Question: Why is the weather in the UK so varied, and how do we measure and respond to different weather conditions?
Project Options (choose one):
1. Weather Tracker & Graph: Keep a weather journal for two weeks. Each day, record the weather (sunny, cloudy, rain, etc.), temperature, and any interesting details (like “saw a rainbow” or “frost on the grass”). After two weeks, create a simple bar chart or pictogram showing how many days were sunny, rainy, cloudy, etc. Write one or two sentences about which weather was most common and if anything surprised you.
2. DIY Weather Instrument: Pick a weather element to measure and build a simple instrument for it. For example, you could make a rain gauge with a measuring cup or bottle to track rainfall, or a wind vane out of paper and a straw to show wind direction. Use your instrument for a few days and record the results. Take photos or draw your instrument and write a short explanation of how it works and what you observed (e.g. “My rain gauge showed 3 cm of rain on Tuesday, which was the most this week.”).
3. Extreme Weather Safety Guide: Some weather in the UK can be wild (think of thunderstorms, heavy snow, or heatwaves). Choose one type of extreme weather that happens in Britain. Make a safety mini-guide or poster for your family or classmates about that weather. Include: how to know it’s coming (weather warnings), how to stay safe (for example, in a thunderstorm – don’t stand under trees, unplug electronics), and a fun fact (like how thunder and lightning work). Add drawings (like lightning bolts or snowflakes) to make it eye-catching.
Year 2 Spring 1: Nursing Pioneers – Florence Nightingale, Mary Seacole, and Edith Cavell
Challenge Question: Who were Florence Nightingale, Mary Seacole, and Edith Cavell, and how did each pioneer change the field of nursing and help others?
Project Options (choose one):
1. Heroine Trading Cards: Design a set of “trading cards” (like collectible cards) – one for each of the three nurses. On each card, draw a portrait of Florence Nightingale, Mary Seacole, or Edith Cavell. Beneath the picture, list key stats or facts (birth/death dates, where they worked, one famous achievement). On the back, write a short quote or motto that might capture their legacy (e.g. Nightingale’s “Lady with the Lamp”). Share the cards with classmates to teach each other about these figures.
2. Diary of a Nurse: Write a first-person diary entry as either Florence Nightingale during the Crimean War (1850s), Mary Seacole in the Crimea, or Edith Cavell in World War I. Use historical details: for Nightingale or Seacole, describe conditions in the war hospitals, the soldiers you care for, and how you feel about helping the wounded. For Cavell, describe helping soldiers escape and your feelings of courage. Try to capture their voice and the challenges they faced.
3. Nursing Then & Now Poster: Create a poster comparing nursing in the past (1800s or early 1900s) to nursing today. Divide the poster in half. On one side, draw or list features of nursing as experienced by Nightingale/Seacole/Cavell (e.g. oil lamps for light, no antibiotics, working on battlefields or basic hospitals). On the other side, show modern nursing (modern hospitals, technology like x-rays or vaccines, nursing uniforms today). Highlight 2–3 ways nursing has changed because of these pioneers’ contributions (for example, Nightingale helped establish cleaner hospitals which led to modern hygiene practices).
Year 2 Summer 1: Small Steps, Giant Leaps – Exploring Air Travel to Space Travel
Challenge Question: How did human travel extend from the skies into space, and what challenges and wonders have we encountered along the way?
Project Options (choose one):
1. Flight Inventions Timeline: Make a timeline of key events in air and space travel. Include at least 5 events spanning from the first hot air balloon or Wright brothers’ airplane flight, through milestones like the first passenger jet, and ending with space achievements (first satellite, first moon landing in 1969, perhaps the Mars rover). For each event, write a date and a one-sentence caption (e.g. “1969 – Apollo 11: First humans walk on the Moon.”). Add small drawings or print images (a plane, a rocket) to illustrate. Arrange your timeline in order (you can do this on poster paper or digitally).
2. Astronaut Training Challenge: Design a simple “astronaut training” obstacle course or exercise routine in your backyard or living room. Think about how astronauts need fitness, agility, and problem-solving. For example, crawling under chairs could simulate moving in a space capsule, and doing spins could simulate dizziness in zero-gravity. Write out a list of 5–6 “training tasks” in the order someone should do them, with a short explanation of what skill each task tests. (Bonus: You can invite family members to try your astronaut training course!)
3. Invent a Planet Travel Brochure: Imagine in the future people can take vacations to another planet or the Moon. Choose a destination (another planet in our solar system, or Earth’s Moon) and create a travel brochure or poster advertising it. Include 2–3 attractions or things tourists could do there (e.g. “Jump in low gravity on the Moon – you can leap six times higher than on Earth!”). Mention one challenge of visiting (like the extreme temperature or need for a spacesuit) and how travelers will deal with it. Make it colorful and fun, as if you work for a space travel agency!
Year 3 Autumn 1: From Cave Dwellers to Iron Makers – Prehistoric Britain
Challenge Question: How did life in Britain change from the Stone Age to the Iron Age, and how can we learn about prehistoric times from the clues left behind?
Project Options (choose one):
1. Prehistoric Life Diorama: Build a model scene that shows a snapshot of life in prehistoric Britain. You could choose the Stone Age (Paleolithic or Neolithic), Bronze Age, or Iron Age. For example, a Stone Age scene might include a cave with people making cave paintings or hunters with spears and animals around; an Iron Age scene might include a roundhouse in a hillfort with people smelting iron. Use clay, cardboard, or natural materials (twigs, stones) to create the scene. Include at least 3 details that are true to the time period. Write labels or a short description explaining each detail (e.g. “Stone Age people used stone-tipped spears for hunting.”).
2. Timeline of Tools: Create a visual timeline illustrating the development of tools from the Stone Age through the Iron Age. Draw at least 5 tools or weapons in order (for instance: a flint hand axe, a bow and arrow, a bronze dagger, an iron sword, etc.). Under each drawing, note the approximate era and one advantage that new tool gave people (e.g. “Bronze axe – Bronze Age: harder and more durable than stone.”). Show how technology improved over time.
3. Prehistoric Diary (Story): Write a diary entry or short story from the perspective of a child living in prehistoric Britain. You could be a child in a nomadic hunter-gatherer tribe or a child in an Iron Age village. Describe your daily life: what you eat, where you live (cave? roundhouse?), what chores or activities you do (helping make tools? herding animals?), and what you worry or wonder about. Include at least two historically accurate details (for example, mention hunting a mammoth if it’s Ice Age, or grinding grain if it’s a later farming community).
Year 3 Autumn 2: Conquering Britannia – The Roman Empire’s Occupation and Influence on Britain
Challenge Question: What changes did the Romans bring to Britain during their occupation, and how did life and society transform as a result?
Project Options (choose one):
1. Roman Innovations Museum: Create a mini “museum exhibit” displaying three important innovations or contributions the Romans brought to Britain. For example: roads, aqueducts (plumbing), Roman numerals, towns and forts, Latin language, or new foods. For each innovation, make or draw a simple artifact or model (e.g. a little model of a straight Roman road cross-section, a pretend aqueduct with water, a chart of Roman numerals, etc.) and write a short museum label (1–2 sentences) explaining its impact (“Romans built straight, durable roads which connected towns – some form the basis of roads we use today.”). Display your three items on a table as if in a museum.
2. Letter Home as a Roman Soldier: Imagine you are a Roman soldier stationed in Britain around 100 CE. Write a letter back home to your family in Italy. In your letter, describe what Britain is like (the weather, the people – Celts – and their customs). Mention the work you’re doing (perhaps building Hadrian’s Wall or manning a fort), and your feelings about being so far from home. Also mention one Roman invention or practice you’re glad to have with you in Britain (heated bathhouse, good roads, etc.). This will show what the Romans introduced here.
3. Celtic vs Roman Life Comparison: Make a Venn diagram or comparison chart of life as a Celtic Briton versus life as a Roman in Britain. Compare at least 4 aspects such as: housing (roundhouses vs Roman villas), clothing (Celtic tribal clothes vs Roman togas/armor), religion (druids and nature gods vs Roman gods and goddesses), and governance (tribal chiefs vs Roman law/government). Where things overlap (maybe some Celtic people adopted Roman customs over time), put those in the intersecting part of the Venn diagram. Add small sketches or symbols (a Celtic knot, a Roman eagle) to decorate. Underneath, answer in a few sentences: In what ways did Roman rule change how people lived in Britain?
Year 3 Spring 1: Mighty Mountains – Exploring the World’s Highest Places
Challenge Question: Where are the world’s highest mountains, how were they formed, and what challenges and wonders do they present to those who explore them?
Project Options (choose one):
1. Top 5 Peaks Factfile: Create a factfile of the five highest mountains in the world (the Five Highest Peaks on Earth). For each mountain, list: its name, height, and location (which mountain range and country). Also include one cool fact for each – it could be about the first people to climb it, an interesting animal or plant found there, or a cultural fact (e.g. Everest is called Chomolungma by the local Sherpa people). Present these in a creative format: perhaps each mountain gets its own “trading card” style info card, or make a mini-booklet. Add drawings of mountain silhouettes to visualize their shape.
2. 3D Mountain Model: Choose one famous mountain (it could be one of the highest like Mount Everest, or another notable one like K2, Kilimanjaro, Aconcagua, Denali etc.). Create a 3D model of the mountain. You might use clay, papier-mâché, or even a stacked cardboard cutout. Paint or color it to show snow-capped peaks vs lower green areas. On the base or on a card, include a label with the mountain’s name, height, and one challenge faced by climbers there (e.g. thin air, extreme cold, avalanches).
3. Mountaineer’s Survival Guide: Imagine you are leading an expedition to a high mountain. Make a “survival guide” pamphlet or poster for new climbers. Include at least 4 sections: Gear needed (clothing, tools), Dangers to prepare for (weather, altitude sickness), Teamwork/skills (why you need guides or training), and perhaps a brief training plan (how to get fit for climbing). Use what you know about mountains to inform this guide (for instance, mention that at high altitudes the air has less oxygen, so you must acclimatize). Add drawings like an oxygen tank or a tent on a slope to illustrate your points.
Year 3 Summer 1: The Titanic – The World’s Most Famous Shipwreck
Challenge Question: What can the story of the Titanic’s voyage and sinking teach us about technology, society, and safety, and why does this 1912 shipwreck continue to fascinate us?
Project Options (choose one):
1. Build the Titanic (Drawing or Model): Create a detailed diagram or a scale model of the RMS Titanic. If drawing a blueprint/diagram, label key parts of the ship (e.g. the hull, funnels, lifeboats, compartments) and add notes about its features (like “the Titanic was the largest ship of its time at ~269 meters long”). If making a 3D model (from cardboard, foam, or even Lego), focus on accuracy in shape and proportion. Alongside your diagram or model, include a short explanation of two design flaws or issues (for instance, “Why were there not enough lifeboats?” or “How did the type of metal used contribute to the ship breaking?”).
2. Travelers’ Tales Journal: Write a creative journal as if you were a passenger on the Titanic. Decide if you are a first-class passenger, second-class, or third-class (steerage). Write two dated entries: one from before the iceberg strike, describing the excitement of the voyage and the luxury or conditions you experience; and one after the ship hits the iceberg, describing the evacuation, your feelings, and what you see happening around you. Use realistic detail (for example, first-class might mention the grand staircase and fine dining; third-class might mention sharing cabins and hearing distant music from above). This will incorporate social history as well as the sequence of events.
3. Legacy and Lessons Presentation: Prepare a short presentation (could be PowerPoint, a poster, or spoken with cue cards) on “Lessons from the Titanic.” Identify 3 lessons learned as a result of the disaster. For example: the need for sufficient lifeboats for all passengers, the creation of the International Ice Patrol and new maritime safety laws, improvements in ship design (watertight bulkheads, etc.), or how radio communication was changed. For each lesson, provide a bit of context (what went wrong in 1912) and what changed afterward. Use images if possible (like a picture of a lifeboat or a diagram of the ship’s compartments) to illustrate each point.
Year 4 Autumn 1: The Journey of a River
Challenge Question: How does a river begin, travel, and change along its journey from source to sea, and why are rivers so important to landscapes and human life?
Project Options (choose one):
1. River Journey 3D Map: Construct a 3D model or large drawing of a river’s course from its source in the highlands to its mouth at the sea. Include key features in order: source (maybe a spring or melting glacier), waterfall or rapids, tributaries joining in, meanders in flatter areas, possibly a town or city on its banks, and delta or estuary where it meets the ocean. Label each feature. You might use a long piece of cardboard or paper mache for 3D terrain. Add creative touches (blue wool for water, green for forests, tiny paper buildings). Alongside your model/map, write a short narrative or captions describing the river’s “journey” and how the water’s speed or character changes at each stage.
2. River in a Box Science Experiment: Create a simple “river in a tray” experiment to see how water forms rivers. Using a paint roller tray or a tilted baking pan, lay sand or soil to mimic ground and then pour water from the top to act as rain from the source. Observe how the water cuts channels and moves sediment. Take photos or sketch the pattern the water makes (meanders, small delta at the bottom). Write a brief report on what happened: Did the water create bends? Carry sediment? How does this tiny model relate to real rivers shaping the land?
3. Rivers and Life Case Study: Research one major world river (for example, the Nile, Amazon, or Ganges) and prepare a one-page case study on how it supports human and natural life. Include: which countries it flows through, one or two major cities on its banks, how people use the river (for farming irrigation, transport, fishing, etc.), and one challenge it faces (pollution, flooding, etc.). Add a small map or sketch of the river’s path across the country/continent. Conclude with a sentence on why that river could be called the “lifeblood” of its region.
Year 4 Autumn 2: The Egyptians – Who Was Tutankhamun?
Challenge Question: What does the discovery of Tutankhamun’s tomb reveal about Ancient Egyptian civilization, and why has the story of Tutankhamun captivated people around the world?
Project Options (choose one):
1. Mystery of the Tomb Journal: Imagine you were with Howard Carter in 1922 when he discovered Tutankhamun’s tomb. Write a first-person journal entry for the day the tomb was opened. Describe the anticipation (years of searching in the Valley of the Kings), the moment you glimpse the treasures by candlelight (the golden shrines, statues, chests of goods, and the sealed door to the burial chamber), and how you feel (excited, astonished, cautious). Include direct thoughts or even a famous line (Carter’s real quote was when asked if he saw anything, he said “Yes, wonderful things.”). This creative writing should convey the wonder of that archaeological moment.
2. Treasure Catalog: Create a mini catalogue of at least 5 artifacts found in Tutankhamun’s tomb. For each artifact (for example: the golden mask, throne, chariot, canopic jars, game board), draw or find an image and write a brief “museum label” for it. The label should say what the object is, what it’s made of, and one idea of what it tells us about Egyptian life or beliefs (e.g., “Canopic Jar – held the pharaoh’s organs, showing the importance of burial rituals and belief in an afterlife.”). Bind or present your catalogue like a booklet titled “Treasures of King Tut’s Tomb.”
3. Ancient Egypt Board Game: Design a simple board game inspired by Ancient Egypt. The path of the game could wind through various Egyptian landmarks (pyramids, Nile River, temples). Create at least 15 spaces. Some spaces should be “event” spaces with a card or instruction – for example, “You help build a pyramid, move forward 2 spaces” or “Bitten by a snake on the Nile, lose one turn.” Incorporate facts: maybe a “Sphinx riddle” space where a player has to answer a question about Egypt to continue. Make a small rule sheet explaining how to play. Decorate the board with Egyptian symbols (ankhs, scarabs, eyes of Horus).
Year 4 Spring 1: Migration (Brazil Case Study)
Challenge Question: Why do people (or animals) migrate from one place to another, and what can the story of migration in Brazil teach us about the causes and effects of movement?
Project Options (choose one):
1. Human Migration Story Map: Focus on a human migration related to Brazil. One example is the migration from rural areas (like the Amazon region or Nordeste) to big cities like São Paulo or Rio de Janeiro. Draw a simple map of Brazil and illustrate this movement with arrows from a countryside area to a city. On one side of the map, list 2–3 push factors (reasons people leave rural areas – e.g. lack of jobs, drought in Northeast Brazil) and on the other side list 2–3 pull factors (reasons they move to the city – e.g. job opportunities, better schools). Write a short paragraph about one challenge migrants face when they arrive in the city (maybe living in crowded neighborhoods or missing home) and one benefit they seek (like education or income).
2. Wildlife Migration Case: Consider animal migration in Brazil. For example, the journey of Amazon river dolphins during seasons, or birds migrating within South America. Create a mini-poster on this: show the path of the animal’s migration on a map or diagram and explain why it migrates (seasons, breeding, food). Then connect it to human behaviour: Are there similarities in why animals and people migrate? Write 2 sentences comparing them (e.g. “Both people and animals migrate to find better conditions – people seek jobs or safety, animals seek food or breeding grounds.”).
3. Diary of a Child (Brazilian Child's Perspective): Write a short diary or letter from the perspective of a child who moved with their family from a small village in Brazil to a large city like São Paulo. Describe the journey (by bus? hours of travel?), your feelings leaving home, and your first impressions of the city. Mention differences (from open spaces to tall buildings, or climate differences if applicable). Explain one reason the family moved (perhaps to join a relative or for a job in a factory) and one hope the child has for their future in the new place. This personal angle will help you empathize with migrants’ experiences.
Year 4 Summer 1: The Changing Role of Women and How They Have Shaped Our World
Challenge Question: How have the roles and rights of women changed over time, and who are some women who have led the way in shaping our world for the better?
Project Options (choose one):
1. Timeline of Women’s Rights: Create a timeline highlighting at least 6 key milestones in the history of women’s rights and equality. These might include dates like 1893 New Zealand gives women the vote (first country to do so), 1918/1920 women gain voting rights in UK/US, 1940s-80s first women leaders in various fields, 1979 Margaret Thatcher as first female UK Prime Minister, 2020s milestones like the first female vice president in the US, etc. For each milestone, write a brief note on what changed and one influential woman associated with it if applicable (e.g. Emmeline Pankhurst for suffrage, Marie Curie for science achievements, Rosa Parks for civil rights affecting women of color, Malala Yousafzai for girls’ education). Present it in order on a long paper or digital slides.
2. Biography Poster: Choose an inspiring woman from history or today (examples: Rosa Parks, Florence Nightingale, Marie Curie, Amelia Earhart, Malala Yousafzai, Ada Lovelace, Frida Kahlo, Emmeline Pankhurst, Ada Lovelace, Greta Thunberg, etc. – there are many possibilities from various fields). Create a poster or one-page biography that includes: a picture or drawing of her, a timeline or list of her major accomplishments, a quote of hers (if available), and a short paragraph on how her actions or work have impacted society. Make sure to highlight what challenges she overcame because of her gender or context, and how she led change.
3. Debate or Speech – “Breaking Barriers”: Write a short speech or create a mini-debate script about why it’s important to have equality and representation of women in all fields (politics, science, arts, etc.). In your speech, mention at least two examples of fields where women historically faced barriers and how that has been changing (for instance, “For centuries, women were not allowed to attend university. Now, women are scientists and professors contributing groundbreaking research.”). You could also argue what still needs to improve. If presenting as a debate, you might script a counter-argument that someone could have made in the past (“People once said women shouldn’t vote because...”) and then rebut it. Practicing this as a spoken presentation will develop your higher-level understanding and confidence in public speaking.
Year 5 Autumn 1: The Ancient Greeks
Challenge Question: What are the lasting achievements of Ancient Greek civilization, and how do ancient Greek ideas influence our lives today?
Project Options (choose one):
1. Greek Invention Pitch: The Ancient Greeks contributed many ideas and inventions (like democracy, the Olympics, theatre, philosophy, architectural columns, etc.). Choose one such achievement and create a “Dragons’ Den” style pitch for it as if you are the ancient inventor selling the idea. For example, pitch the idea of democracy to a panel (“It’s a new system where every citizen votes – it will change governance!”) or pitch the Olympic Games (“A grand sporting festival to unite city-states in peace and competition”). Write a script or make a short video of your pitch, highlighting why this idea is brilliant and how it could benefit society. Make it persuasive and fun, using a few Greek terms if you can (like “polis” for city-state or referencing Zeus for Olympics).
2. Gods and Heroes Comic Strip: Create a comic strip (at least 6 panels) retelling a famous Greek myth or story of a hero. It could be Theseus and the Minotaur, Perseus and Medusa, or a shortened version of Trojan War events, etc. Draw the scenes and include speech or thought bubbles for characters. Make sure to capture the key moments of the myth (problem, climax, resolution). Add captions or a narrator box as needed to ensure the story makes sense. Through this, you’ll familiarize yourself with Greek mythology and storytelling techniques.
3. Build the Parthenon (Architecture Challenge): Attempt to create a model of a Greek temple – specifically the Parthenon in Athens – using household materials (cardboard, paper towel rolls for columns, clay, etc.). The Parthenon has a rectangular base, many columns (you might do fewer for simplicity), and a triangular pediment on top. After constructing it, write a short description of what the Parthenon was (a temple to Athena), and more generally how the architecture of ancient Greece (with its columns and styles) has influenced modern buildings (for example, how many banks, museums or government buildings have a similar facade with pillars).
Year 5 Autumn 2: Iceland – The Land of Fire and Ice
Challenge Question: How do the unique geological features of Iceland (“fire” from volcanoes and “ice” from glaciers) shape its landscape and way of life, and what makes Iceland a leader in renewable energy?
Project Options (choose one):
1. Volcano vs. Glacier Exhibit: Make a two-sided poster or shoebox diorama showing the contrast between Iceland’s volcanoes and glaciers. One side (or half) should depict a volcanic scene – perhaps an erupting volcano like Eyjafjallajökull, with lava and ash – and include 2 facts about Iceland’s volcanoes (e.g. how eruptions can disrupt air travel, how geothermal heat is used). The other side shows a glacier scene – maybe Vatnajökull ice cap with icy caves or a glacier-fed waterfall – and 2 facts about glaciers (e.g. how they shape the land, how they are affected by climate). Make it vivid: use cotton or tissue for ice/snow, red/orange paper for lava. Write a sentence comparing how “fire and ice” coexist in the same country.
2. Renewable Energy Brochure: Iceland is famous for using geothermal and hydroelectric energy. Create a brochure or infographic titled “Green Energy in Iceland.” Include: an explanation of geothermal energy (with a small diagram of how hot water underground powers turbines), an explanation of hydroelectric power (maybe a drawing of a dam or waterfall driving energy), and one example of how Icelandic people benefit (clean electricity, hot water heating homes, even baking bread in hot ground!). Use simple terms and visuals so someone your age can understand how Iceland gets most of its energy from nature.
3. Travel Itinerary Project: Plan a 3-day dream trip to Iceland for a family interested in nature and science. Outline each day with one “fire” related destination and one “ice” related destination. For example: Day 1: Visit Thingvellir National Park (where you can see the Mid-Atlantic Ridge plates pulling apart) and then go to Geysirto see erupting hot springs (fire/geothermal). Day 2: Hike on Solheimajökull Glacier (with a guide) in the morning (ice), then relax in the Blue Lagoon hot springs in the evening (fire/geothermal). Day 3: Tour Eyjafjallajökull Volcano visitor centre (fire) and see Jökulsárlón Glacier Lagoon to watch icebergs (ice). Present this itinerary as a mini booklet or a poster with a map, including short descriptions or fun facts for each stop.
Year 5 Spring 1: Journey Around the World – Longitudes and Latitudes
Challenge Question: How can we use lines of latitude and longitude to locate places on Earth, and what surprises might we find when comparing locations around the globe?
Project Options (choose one):
1. Coordinate Treasure Hunt: Create a “treasure hunt” game using latitude and longitude coordinates. Choose 5 world cities or landmarks and find their lat/long coordinates (e.g. London ~ 51.5°N, 0°; Nairobi ~ 1°S, 36°E; Tokyo ~ 36°N, 140°E etc.). Write each as a clue like “Find the city at 1°S, 36°E” (answer: Nairobi). Provide a blank world map (which you can draw or print) and mark the answers on it after the game. You might give this quiz to classmates or family. Also, for each location, write one interesting fact that might hint at the place (for example: “At 51.5°N, 0°, you’d find a famous clock tower and the River Thames”). This game makes you practice reading coordinates and learn geography trivia.
2. Same Latitude, Different Places Photo Album: Pick a latitude line (for example, the Equator (0°), 30°N, or 60°N) and find 4–5 different places around the world that lie close to that latitude. For instance, at around 30°N: Houston (USA), Cairo (Egypt), New Delhi (India), Shanghai (China) are all roughly along that line. Gather or draw a picture representing each place (skyline, landscape, famous site) and create an album or poster. Under each picture, write a sentence or two about the climate or environment (30°N might be desert in Egypt, humid in Houston, etc.) and one cultural or geographic fact. Conclude with a note on how places at the same latitude can be very different due to other factors (altitude, oceans, etc.).
3. Globe-Maker Craft: Build a simple globe that shows latitude and longitude lines. You could inflate a balloon and use a marker to draw the equator, tropics, prime meridian, and a few other key latitude lines (maybe every 30°) and longitude slices. Mark and label the continents roughly to scale. Alternatively, use a styrofoam ball or a papercraft template. When finished, use your globe to “demonstrate” to a family member how to read off coordinates (point to a spot and estimate its lat/long). Write a short reflection on what was challenging about translating the flat world map to a round globe (you’ll notice things like how far apart lines are at different points).
Year 5 Summer 1: The Anglo-Saxons and Sutton Hoo
Challenge Question: What does the Sutton Hoo ship burial tell us about the Anglo-Saxon people and their culture, and how did Anglo-Saxons influence the land and language of England?
Project Options (choose one):
1. Sutton Hoo Treasure Reproduction: Sutton Hoo’s discovery included remarkable treasures (the famous helmet, shield, jewelry, coins, etc.). Pick one iconic item from the Sutton Hoo burial finds – for example, the Sutton Hoo helmet or the gold buckle or a shoulder clasp – and create a replica or detailed drawing of it. Use cardboard, foil, clay, or any craft materials to mimic its appearance (for the helmet, you might use papier-mâché; for jewelry, shiny foil and beads). Alongside your replica, write an “artifact report” as if you’re a museum curator: describe what the object is, what it’s made of (the original, e.g. iron helmet with tin bronze panels), and what it suggests about the Anglo-Saxon leader buried there (e.g. wealth, artistry, connections to other lands due to intricate design).
2. Anglo-Saxon Runes Secret Message: Learn the Anglo-Saxon runic alphabet. Write a short message or phrase in runes on paper or carving (e.g. “Knowledge is Power” or your own motto/name). Then create a “decoder sheet” for your classmates: on one side, show each rune and the letter it corresponds to in English. Challenge them to decode your message. In a short paragraph, explain how and why Anglo-Saxons used runes (for writing on wood/stone, mostly for inscriptions and messages, before Latin alphabet came with Christian missionaries). Maybe also note a modern example of a rune if any (like Bluetooth symbol is actually two runes merged!).
3. Village Life Illustrated Map: Draw a detailed birds-eye view of an Anglo-Saxon village. Include typical features like: wooden thatched houses, a hall for the chief, fields and livestock, perhaps a church, and protective earth walls or wooden fences around. Label the parts of the village. Create 3–4 “snapshot” captions around the edges of your map where you describe daily life scenes – for instance, “Farmers ploughing fields with oxen,” “Women weaving cloth outside a hut,” “Children collecting water from the stream,” “A meeting in the great hall discussing laws.” This gives a visual and textual sense of Anglo-Saxon society and economy.
Year 6 Autumn 1: The Rise of Victorian Britain – Industry, Inventions, and Inequalities
Challenge Question: How did the Industrial Revolution transform Britain during the Victorian era, and what inventions and social changes brought both progress and problems?
Project Options (choose one):
1. Invention Showcase: Research one important Victorian invention or inventor (such as the steam locomotive (George Stephenson), the telephone (Alexander Graham Bell), the light bulb (Thomas Edison), although American, its widespread use impacted Victorians; photography, vaccines (like smallpox vaccine earlier by Jenner), even everyday items like flushing toilets or bicycles). Create a presentation board or slideshow about it. Include: what the invention is, who invented it and when, and how it changed people’s lives. Also mention if it had any downsides or needed improvements. Add a drawing or print a picture of the invention. For a personal touch, imagine and write a quote from a Victorian person reacting to it.
2. Child Labour Photo-Story: Investigate what life was like for poor Victorian children during the Industrial Revolution (in factories, mines, workhouses). Create a photo-story or illustrated storyboard. Find 3–4 historical photographs or make sketches depicting scenes like children working in a textile mill, as chimney sweeps, in a coal mine, or a classroom after reforms. Write a narrative or captions from the perspective of a Victorian child for each image (for example, “My name is Jack, I’m 10, I work 12 hours in a mill. I’m so tired...” then later “Now laws limit our work and I go to school part-time.”). Arrange these as a sequence that shows the problem (child labor) and then the reform (like the Factory Acts, introduction of schooling). This story will highlight the inequalities and the social reforms of the era.
3. Victorian Era Debate (Speech writing): Write and perform a short debate on an issue from Victorian times. For instance, a debate between a factory owner and a worker’s rights reformer about labor conditions, or between a traditionalist and a suffragist about women’s roles. Write out each side’s main points. Example topic: “Should children under 13 be allowed to work full-time in factories?” The factory owner might argue about economic need, while the reformer argues for education and health. Conclude with what actually happened historically (laws were passed to restrict child labor). This exercise develops your ability to see multiple sides of historical change and articulate arguments.
Year 6 Autumn 2: Exploring the Wonders of the Galapagos
Challenge Question: What makes the Galapagos Islands so scientifically and ecologically important, and how did studying these islands lead to new ideas about nature and evolution?
Project Options (choose one):
1. Galapagos Field Guide: Imagine you are a naturalist visiting the Galapagos like Charles Darwin did. Create a mini field guide of Galapagos wildlife. Include at least 5 entries: e.g. Galapagos giant tortoise, marine iguana, blue-footed booby, Galapagos penguin, finches (the famous ones with different beaks). For each entry, draw or include an image and write a brief description focusing on a unique adaptation or trait (e.g. “Marine iguana – the only lizard that swims in the ocean; it has flattened tail and claws to grip rocks while grazing algae.”). Explain why that adaptation helps it survive. Bind your pages together or present as a booklet, perhaps with a map of the islands in the introduction.
2. Evolution Connection Diary: Write a diary entry as Charles Darwin during his 1835 visit to the Galapagos. Describe one day on a particular island, noting what different animals you observe. In your diary, include the wonder or questions that cross your mind (e.g. noticing how finches on one island have thicker beaks than on another where they eat different food). End the entry with a hint of the big idea forming (like “Could it be that species change from island to island?”). Then, accompany the diary with a short explanation in plain modern language of what Darwin eventually concluded from such observations – the theory of evolution by natural selection. This shows how a higher-level concept was born from simple observations.
3. Conservation PSA: The Galapagos are fragile and face threats (like invasive species, tourism impact, climate change). Create a persuasive PSA (poster or 1-minute video script) about protecting the Galapagos. Come up with a slogan, include 3 key points: perhaps the uniqueness of species found nowhere else on Earth, the importance of keeping the environment pristine, and a call-to-action (like donate to Galapagos conservation or “if you visit, follow the rules to not disturb wildlife”). Use emotional appeal by maybe focusing on an iconic species (like a baby tortoise) and logical appeal by mentioning something like world heritage or scientific value. If it’s a poster, make it visually striking with images; if a script, you will actually perform it to class.
Year 6 Spring 1: The Battle of Britain – Heroes, Sacrifice and Resilience
Challenge Question: How did the Battle of Britain unfold during World War II, who were the people involved, and what made this battle a turning point marked by heroism and resilience?
Project Options (choose one):
1. Battle of Britain Timeline with Profiles: Make an illustrated timeline of the key events of the Battle of Britain (July–October 1940). Mark dates for major air raids or turning points (like 10 July start, 13 August “Eagle Day” (Luftwaffe’s major attack), 15 Sept – peak of battle (now celebrated as Battle of Britain Day), 31 Oct end). Alongside the timeline, include short profiles (with a tiny photo or drawing) of 2–3 individuals: for example, a British RAF pilot (maybe someone like Douglas Bader or “Johnnie” Johnson), a female radar operator or a member of the Ground Observer Corps, and a civilian in London during the Blitz. Under each profile, write a few sentences about their role and acts of resilience or heroism (e.g. a pilot’s bravery in combat, a radar operator’s critical work in tracking planes, a civilian enduring bombings with courage and helping neighbours). This combines chronological understanding with human stories.
2. Aircraft Comparison Project: The battle was also a clash of aircraft. Make a comparison chart of the two primary fighter planes: the British Supermarine Spitfire (and Hawker Hurricane) vs the German Messerschmitt Bf 109. Draw each plane or use images. Create a table of specs and features: speed, maneuverability, firepower, range. Also mention how they were used (e.g. Hurricanes often targeted bombers while Spitfires engaged fighters). Conclude with a short paragraph on how the quality of planes and the strategy (plus radar advantage) helped the outnumbered RAF win. If you’re into models, you could optionally assemble a small model of one of the planes instead and label its parts.
3. Home Front Letter: Write a letter from a London evacuee or a child living through the Blitz to a pen-pal in the countryside or overseas. Describe the resilience side: how life has changed (night-time air raid sirens, sleeping in shelters or Tube stations, rationing of food), and mention any heroes you look up to (maybe pilots, or even local heroes like firefighters or ARP wardens who help during bombing raids). Also convey the spirit of resilience – how people still have hope, slogans like “Keep Calm and Carry On,” and community unity. This personal viewpoint will help you appreciate the civilian experience and courage during the Battle of Britain.
Year 6 Summer 1: Rites and Rituals – The Maya Civilisation
Challenge Question: Who were the Maya, what were some of their most important rituals and cultural achievements, and how did their way of life reflect their beliefs and environment?
Project Options (choose one):
1. Maya Codex (Flipbook): The Maya wrote in hieroglyphics in folding books called codices. Create your own “Maya codex” on paper strips or an accordion-fold booklet. Choose a theme for your codex, such as a day in the life of a Maya teenager, or a Maya religious festival. Draw a sequence of at least 6 pictures with brief captions (you can even attempt a few Maya glyph-like symbols alongside). For example, your codex might show: waking up in a thatched house, grinding maize for tortillas, a market scene, a ritual at the temple pyramid, a ballgame in the afternoon, and stargazing or a ceremony at night. Make the style bold and include natural colors. On the last page, include a key explaining two actual Maya glyphs you learned (perhaps the glyph for a calendar day or a maize symbol) and what they mean.
2. Chocolate History Presentation: The Maya (and Aztecs) were among the first to cultivate cacao and make chocolate drinks – chocolate has a rich history in Mesoamerican culture. Create a short presentation or a poster titled “From Maya Cacao to Chocolate Today”. Include: how the Maya grew and used cacao (as a spicy drink, even as currency sometimes), what rituals or symbolism chocolate had (e.g. used in weddings or offerings to gods), and then how it was later introduced to the world (Spanish conquistadors taking it to Europe, etc.). If possible, include a fun demo: you might try mixing a simple “Maya-style” hot chocolate at home (cocoa, water, chili, vanilla – no milk or sugar as they didn’t use those) and describe the taste! Add pictures of cacao pods and ancient Maya pottery of chocolate.
3. Maya Math and Calendar Challenge: The Maya had a sophisticated number system and calendar. Write a “math puzzle” activity for your class using the Maya number system (which is base-20 and uses dot = 1, bar = 5, shell = 0). First, learn how to write numbers 1–19 in Maya dots and bars. Then create 5 math problems (like addition or subtraction) written in Maya numerals for your classmates to solve (provide an answer key in normal numbers). Also, illustrate the concept of the Maya calendar (they had a 260-day ritual calendar and a 365-day solar calendar). Perhaps include one fun fact, like the Maya predicted solar eclipses or that their calendar didn’t actually “end” in 2012, that was a misconception. Present your puzzles and facts on a poster or worksheet.